


Xsortex HUB
ESP8266 NodeMCU Board Wi-Fi For Arduino & IoT Projects
ESP8266 NodeMCU Board Wi-Fi For Arduino & IoT Projects
Couldn't load pickup availability
- Technical Support 24/7
- Same Day or 1-Day Shipping near Navi Mumbai
- Free shipping on Orders Above Rs 300/-
 Cash on Delivery available
- Original Product guarantee
- 7-Day Easy Return/Exchange


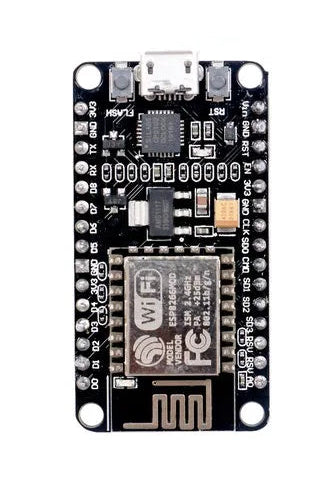
The NodeMCU ESP8266 CP2102 is the go-to open-source Wi-Fi development board for building Internet of Things (IoT) prototypes — a compact, budget-friendly yet powerful board based on the popular ESP8266EX chip. Whether you are a beginner entering the world of connected electronics or an experienced maker building production-grade IoT solutions, this NodeMCU board delivers everything you need in a plug-and-play package. Buy now from Xsortex HUB with fast delivery across India.
This NodeMCU V3-style board features the ESP8266EX processor with 4MB flash storage, onboard Wi-Fi (IEEE 802.11 b/g/n), micro USB programming, and full Arduino IDE compatibility. It is one of the most popular Wi-Fi development boards in India for smart home, IoT cloud, and connected sensor projects.
Why Choose NodeMCU ESP8266?
- Open-source firmware and hardware — massive community support with thousands of tutorials and projects
- Onboard Wi-Fi (IEEE 802.11 b/g/n) — connect to the internet directly without any additional Wi-Fi module
- Low cost, high capability — professional IoT prototyping at a fraction of the price of alternative boards
- Arduino IDE, NodeMCU Lua, MicroPython, and Mongoose compatible — program in the language you know
- 4MB flash with OTA (Over-The-Air) programming supported — update firmware remotely without cables
- Micro USB (CP2102) interface — plug directly into any PC for programming and serial monitoring
- Breadboard-friendly 30-pin layout — snap into any standard breadboard for rapid prototyping
Best For:
- Smart home automation — WiFi switches, relays, IR blasters, sensor hubs
- IoT cloud projects — connect to ThingSpeak, Blynk, AWS IoT Core, Google Firebase
- Weatherstation and environmental monitoring — push sensor data to the web
- Remote control systems — control devices from any smartphone or browser
- Student electronics projects — IEEE, B.Tech, M.Tech IoT project development
- Learning embedded Wi-Fi programming — the best first Wi-Fi dev board for beginners
Technical Specifications:
- Chip: ESP8266EX
- Flash: 4MB
- RAM: 128KB
- Wi-Fi: IEEE 802.11 b/g/n 2.4GHz
- Interface: Micro USB (CP2102 USB-to-UART)
- GPIO: 11 digital I/O pins
- ADC: 1 analog input (0–1.0V)
- Power Input: 5V via micro USB or VIN pin
- Logic Level: 3.3V
- Deep Sleep: <10μA (external wake required)
- OTA Programming: Supported
- Compatible: Arduino IDE, NodeMCU Lua, MicroPython, Mongoose OS
Buy the NodeMCU ESP8266 board online from Xsortex HUB — India's reliable source for Wi-Fi development boards and IoT components with fast delivery.
Frequently Asked Questions
Can I program this board with the Arduino IDE?
Yes. Install the ESP8266 board package through the Arduino IDE Boards Manager, select NodeMCU 1.0 (ESP-12E Module), and upload sketches just like an Arduino. It also supports Lua and MicroPython if you prefer.
My PC does not detect the board. What driver do I need?
This board uses the CP2102 USB-to-serial chip. Install the free Silicon Labs CP210x VCP driver, use a data-capable micro USB cable, and the board will show up as a COM port.
What is the difference between the ESP8266 NodeMCU and the ESP32?
The ESP8266 is a budget-friendly Wi-Fi-only board with one analog pin, perfect for simple connected projects. The ESP32 adds Bluetooth, a faster dual-core processor, more GPIO and more ADC channels. Start with NodeMCU; upgrade to ESP32 as projects grow.
Can I feed 5V into its GPIO pins?
No. The NodeMCU is a 3.3V logic board. Power it through micro USB or the VIN pin with 5V, but keep all sensor and signal lines at 3.3V (use a level shifter or divider for 5V modules).
- Choosing a selection results in a full page refresh.
- Opens in a new window.